Drupal 9 Course: Create a Custom Page - Part 2 - [2021]
We will start off by creating a custom page, later on, this custom page will display a list of movies from the movie API.
Step 1:
Let's start by creating our routing file. A routing file contains a list of URLs (all custom) to custom pages/forms. In your module directory, create the following file `movie_directory.routing.yml`. If you named your module differently, it would be `module_machine_name.routing.yml`. For the record, this file should be within this directory, `web/module/custom/movie_directory.routing.yml`
Step 2:
In the movie_directory.routing.yml file, add the following:
movie_directory.listing:
  path: '/movie-listing'
  defaults:
    _controller: '\Drupal\movie_directory\Controller\MovieListing::view'
    _title: 'Movie Listing'
  requirements:
    _permission: 'access content'
Let's break this down:
- `path` - This is the URL that will be used to access your custom page. In this case, it will be www.example.com/movie-listing
- `_controller` - This is the method that will provide a renderable array of your custom page.
- `_title` - Pretty self-explanatory don't you think?
- `_permission` - This is the permission needed to access this page. `access content` is a permission that the anonymous role has (more on roles later)
Step 3:
Let's create our module file. A module file contains "hooks". In this module file, we will be implementing the theme hook. Create a module file with the following name, `movie_directory.module`. This file should be in the root directory of your module. In this file, you will need to add the following:
<?php

/**
 * Implements hook_theme().
 */
function movie_directory_theme($existing, $type, $theme, $path) {
  return [
    'movie-listing' => [
      'variables' => ['content' => NULL]
    ]
  ];
}
This hook will create a custom template with a variable called content. After creating this hook, we can now create the corresponding template.
Step 4:
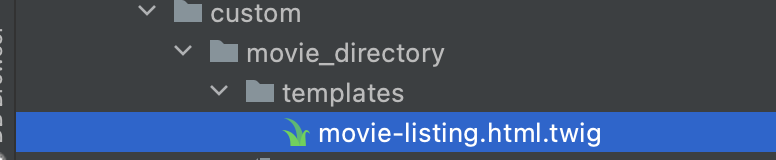
In the movie directory module, let's create a new folder and name it `templates`. In this new directory, create a new file and name it `movie-listing.html.twig`. Make sure that the file name matches the template name you added in the .module file.
Step 5:
Now we have to create our Controller file. This is the file that will contain our content for the page. Create a file called `MovieListing.php` in this directory, `web/module/custom/src/Controller/`. You will notice two new directories in that path, `src` and `Controller` - Make sure to create those.

Step 6:
Create the skeleton of our Controller file.
<?php

namespace Drupal\movie_directory\Controller;

use Drupal\Core\Controller\ControllerBase;

class MovieListing extends ControllerBase {


}
Now let's create the `view` method that will render our custom page.
  public function view() {
    $content = [];

    $content['name'] = 'My name is Ben';

    return [
      '#theme' => 'movie-listing',
      '#content' => $content,
    ];
  }
So you'll see we have a few things in our method already.
We begin by initializing our $content variable.
Next, we add a new property to our $content variable. This will allow us to print the `name` property in our custom twig template we created earlier.
Now we return what we call in Drupal, a 'renderable array'. The majority of the keys in a renderable array tends to begin with a #
So overall, your MovieListing.php file should look like this:
<?php

namespace Drupal\movie_directory\Controller;

use Drupal\Core\Controller\ControllerBase;

class MovieListing extends ControllerBase {

  public function view() {
    $content = [];

    $content['name'] = 'My name is Ben';

    return [
      '#theme' => 'movie-listing',
      '#content' => $content,
    ];
  }
}
Step 7:
Now let's open up our template file, `movie-listing.html.twig`. It should be empty. Now we can add our content variable. In twig, you would write:
{{ content }}
In this case, we want to render our string "my name is ben" on our custom page. So we would write:
{{ content.name }}
Step 8:
After all that, we still will NOT be able to see our custom page. In Drupal, you will learn that clearing caches becomes a common thing. So two ways to clear caches.
- Method 1: In your terminal, run the following command, `drush cr` in your project directory.
- Method 2: Configuration > Development > Performance | Clear Caches
Step 9:
Open up your browser and visit our newly built custom page. My website URL is `http://movies-website.local` - So to access our new custom page, I would have to visit `http://movies-website.local/movie-listing`

Step 10:
Be proud of yourself! Breathe, Relax, we're done here! Onto the next one!